I have mentioned before, we LOVE Mexican food in this house.
If I ask my husband and kids for any sort of request, you can bet tacos will be one of them (my Instant Pot Carnitas and ground beef tacos are there most requested).
Or really…ANY Mexican food…100% of the time.
And usually it is at least HALF of their allotted request list! I’ve taken to letting them know that I do indeed get it…no need to include any Mexican food in their requests…I already KNOW!!
What is a chimichanga?
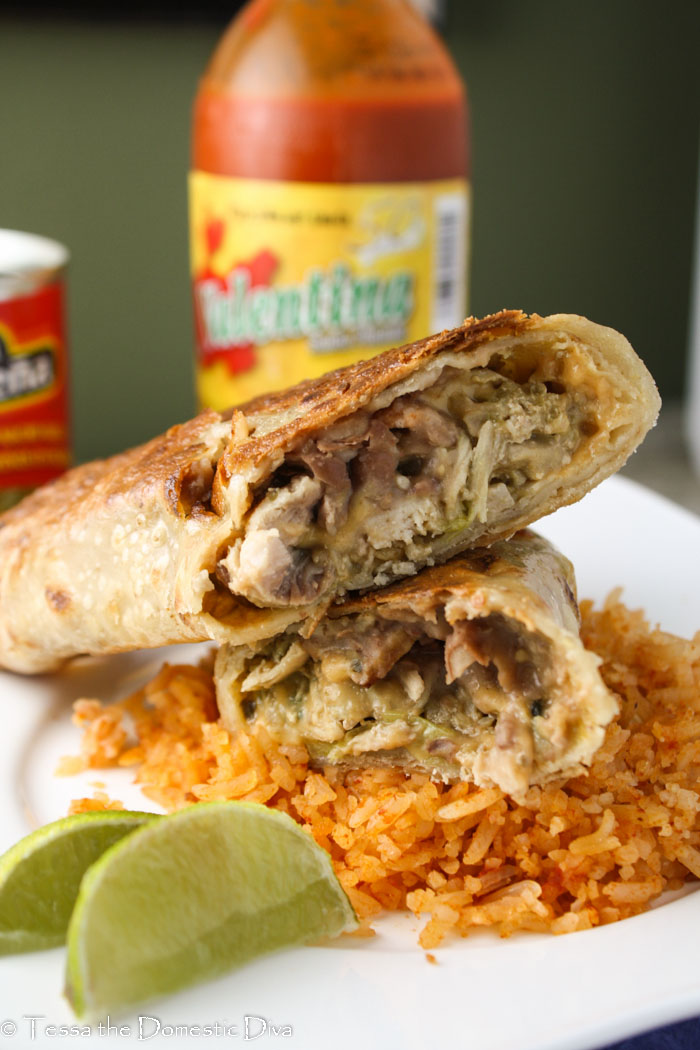
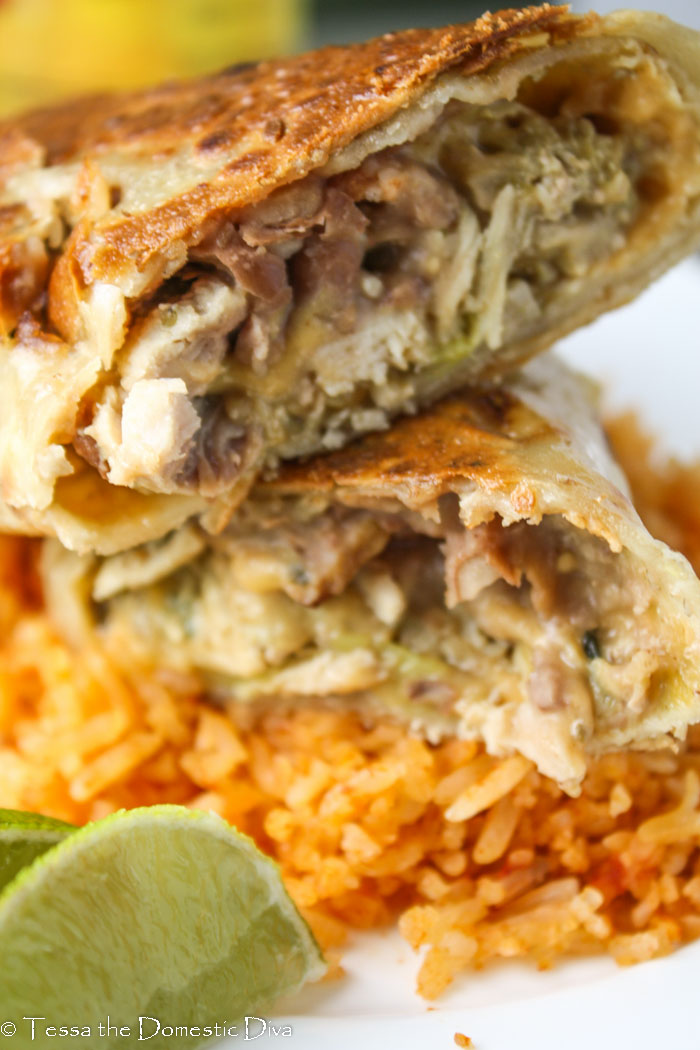
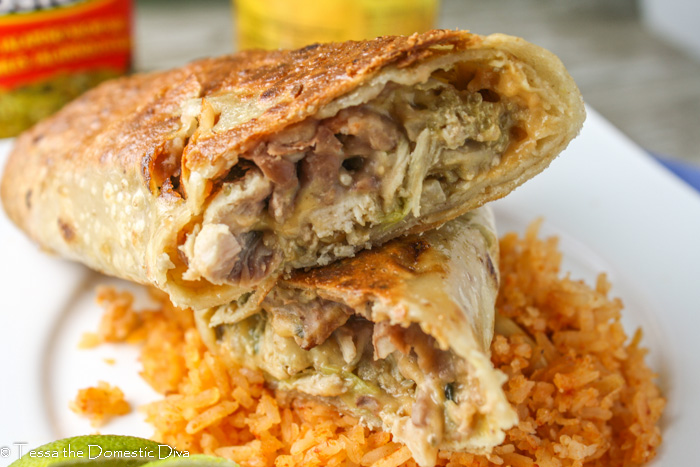
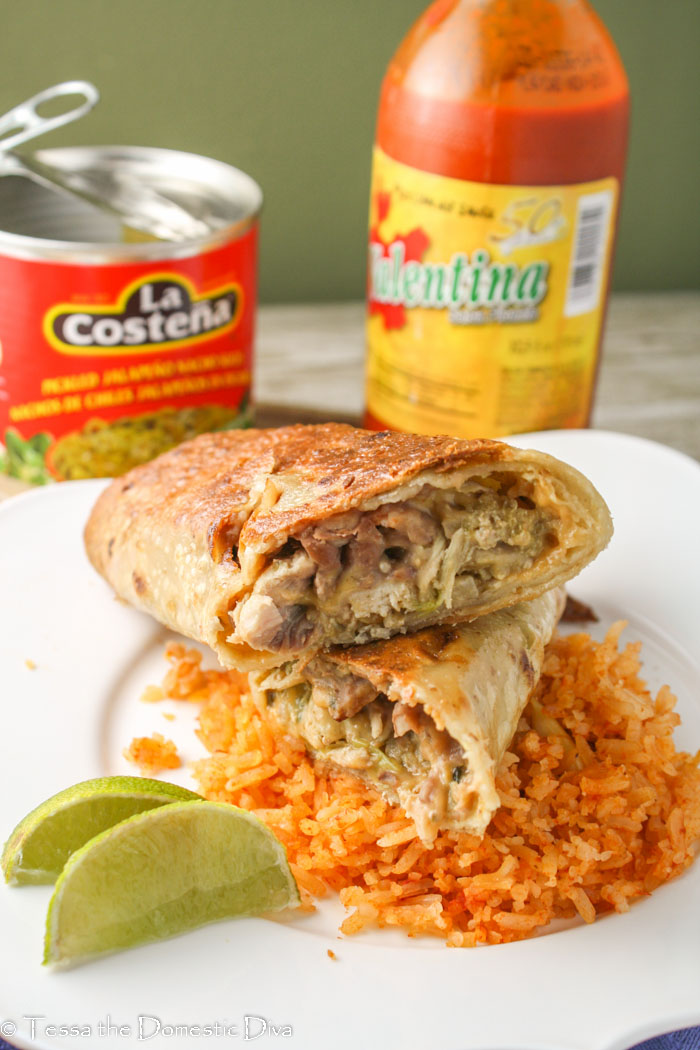
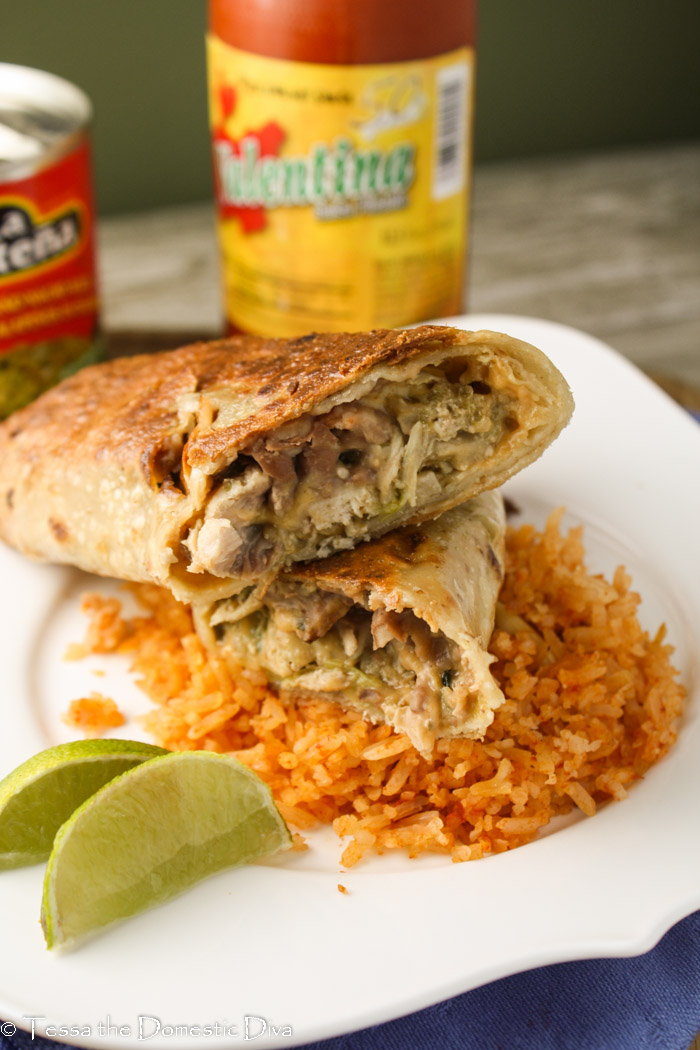
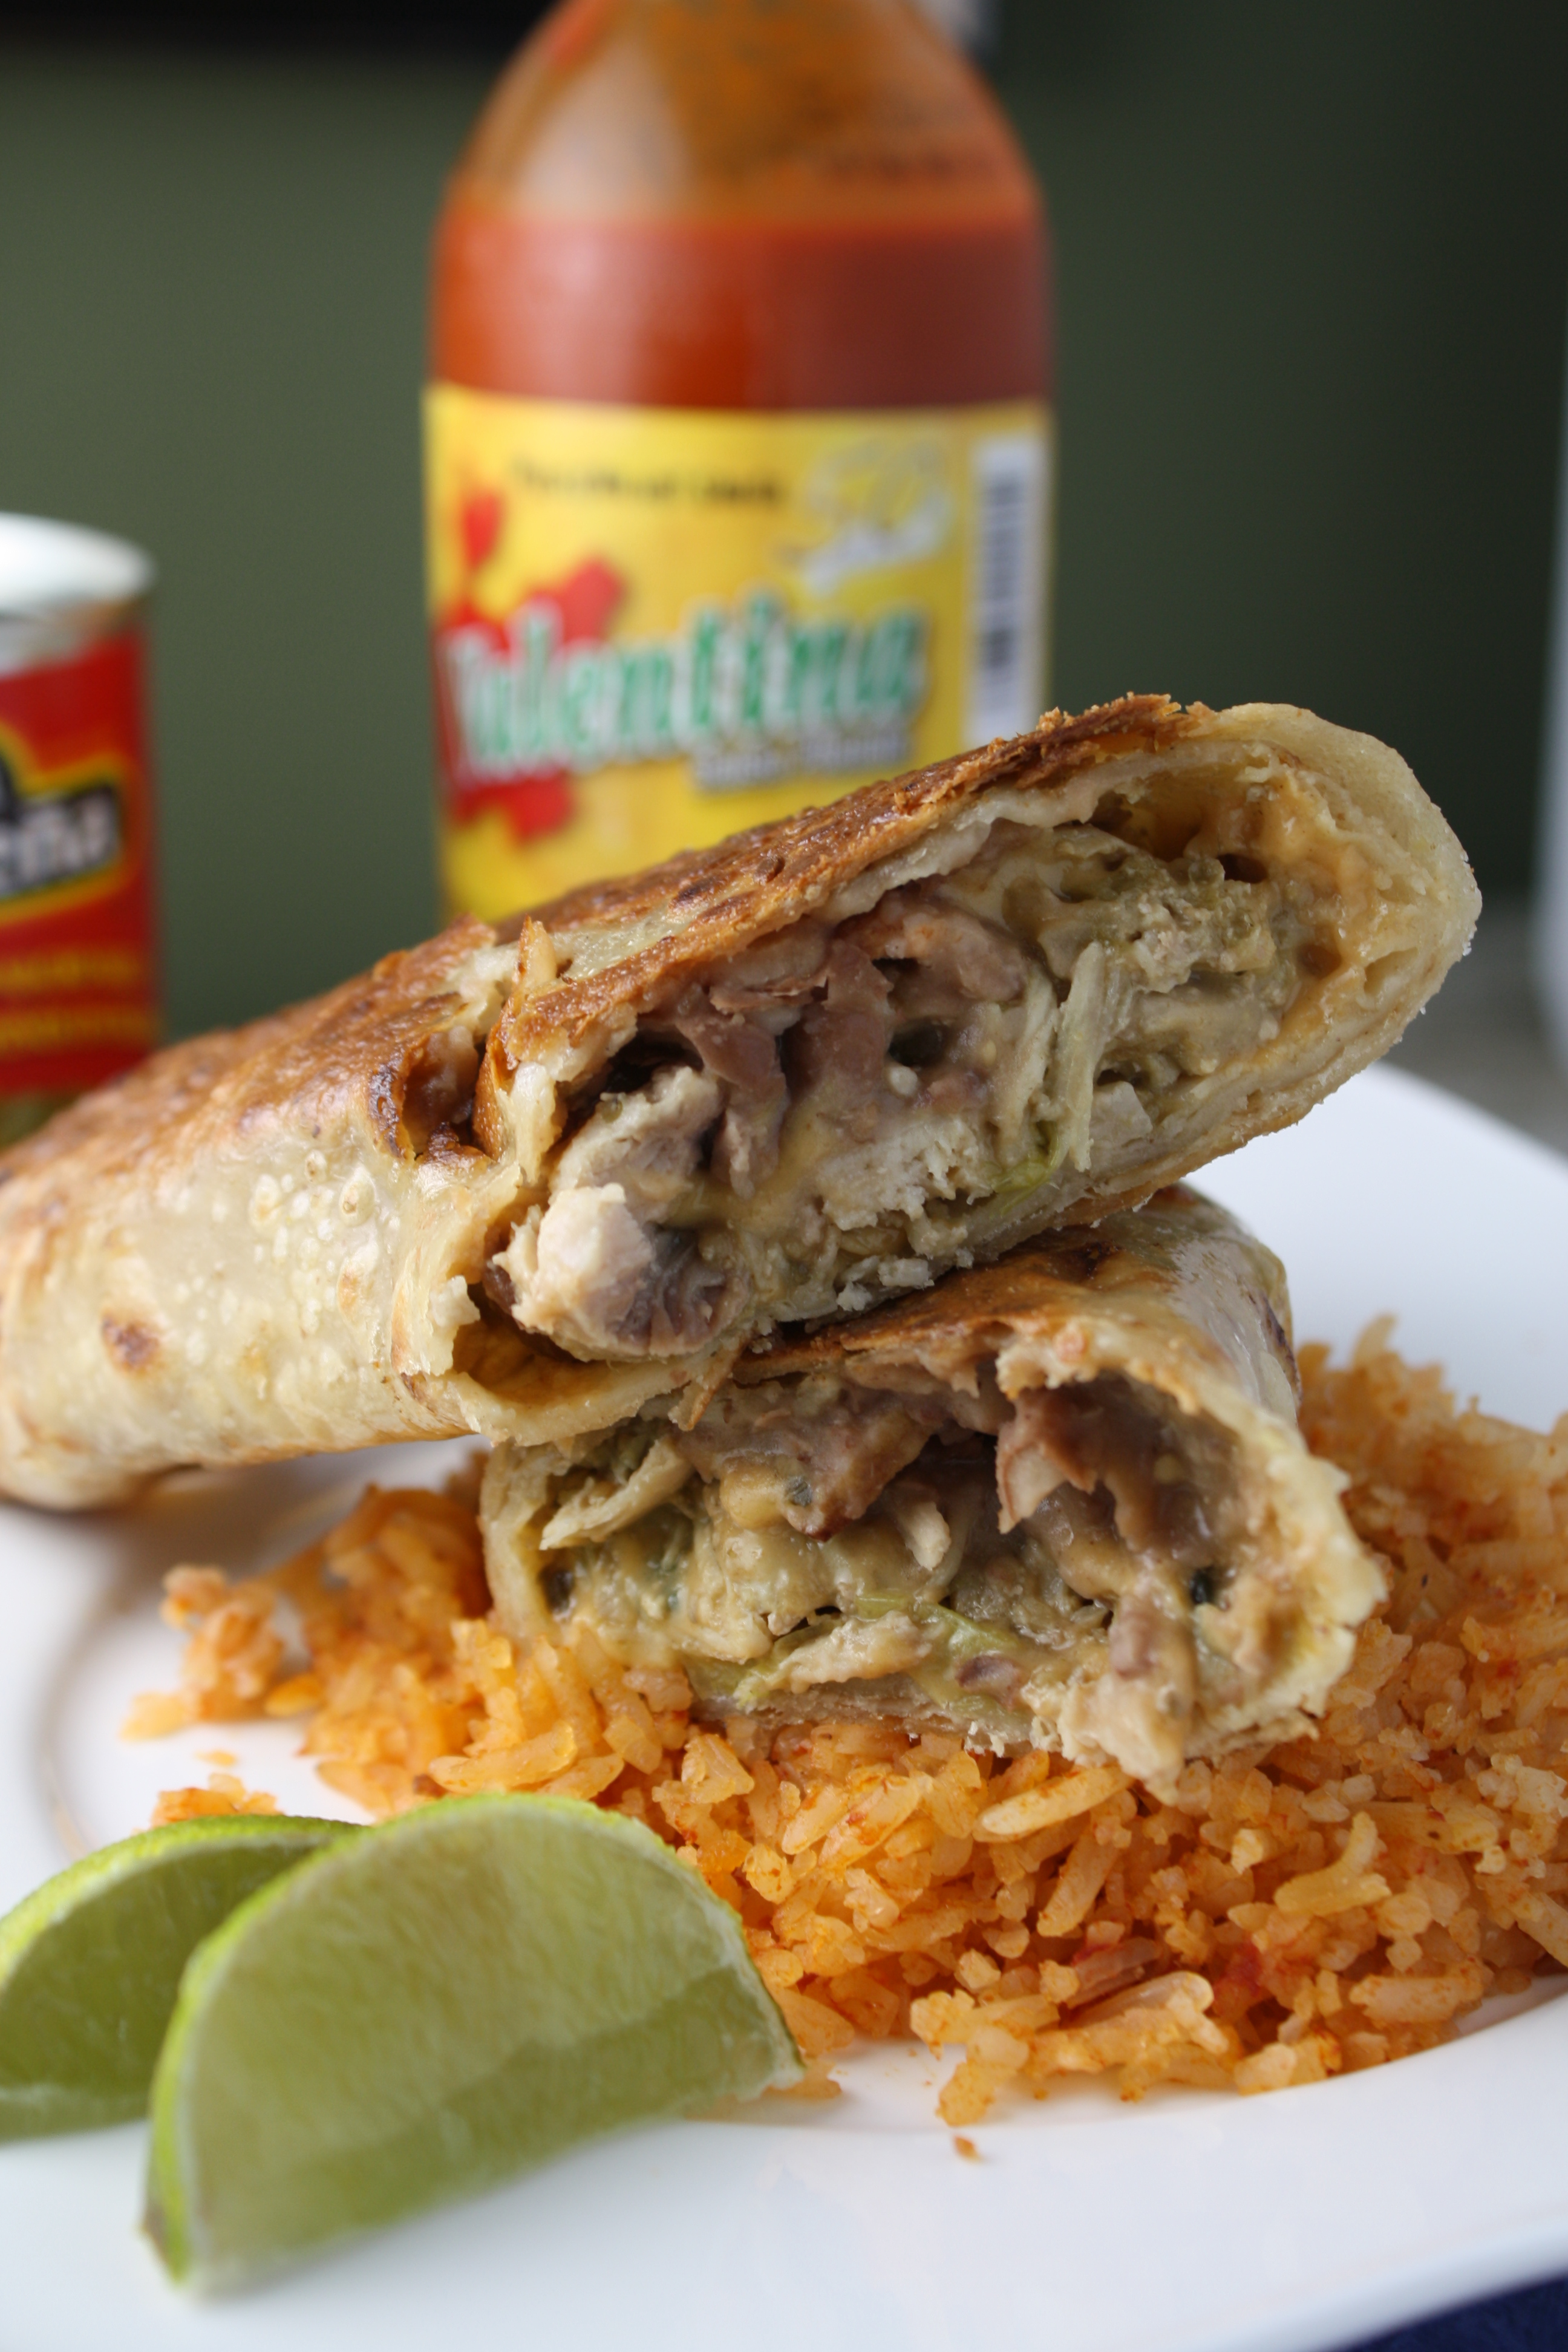
These gluten free baked chicken chimichangas are basically our tacos (and all our versions thereof!!), made into a crunchy burrito!
Officially, and traditionally, they are a flour tortilla filled with any assortment of beans and meat, then crisped up to deep fried perfection in a vat of hot oil.
I LOVE chimis, but there is no way you will ever find me deep frying: a BIG hassle! It uses SO much oil (and healthy fats like coconut and avocado that I would fry in are expensive!). Plus, I am more interested in a lighter chimichanga….one a bit healthier!
So how do you create an extra crunchy, crisp exterior without the deep fryer?
I’ll teach you!!
Consider this oven baked chimichanga recipe a technique lesson and do all the fillings of your own choosing!
Baked beef chimichanga and additional filling ideas:
Your fillings can be whatever you want, but THIS time, I used my Spanish rice recipe, my refried bean recipe, and some rotisserie chicken that needed to be used up.
I have also made this with ground beef taco filling a gazillion times too..
These are some additional taco meats we rotate through:
We also regularly use my Best Darn Pot of Pinto Beans too, loads of options! And if you love Chipotle’s lime rice, you could use that too!
I love to make a dip with sour cream and any favorite salsa. You could try this chipotle salsa!
Baked chicken chimichanga prep time note:
It’s also noteworthy that this meal usually takes me about 30-45 minutes (depending on how many garnishes I prepare and how many times I scramble to find another exciting wooden spoon for the baby to chew on!)
It looks like a lot, but it’s really not so bad (but it WILL use a lot of pots!).
And once the chimichangas are in the oven, you have time to clean up before dinner!
And if you are reusing leftover taco ingredients, prep time is cut in half!
How do you store unused tomato paste?
To save unused tomato paste for another use, I open both ends of the can with a can opener. I then push ONE lid all the way through to the other side to deposit to whole cylinder of paste onto a piece of waiting plastic wrap or parchment paper, roll it up and finally, freeze it.
I find this quite handy as so many recipes only call for a tablespoon here or there, and I hate any food to go to waste!
When I am ready to use some tomato paste, I first remove it from the freezer, then slice off the portion of frozen paste as I need!
Gluten Free Baked Chimichanga Recipe:
This is a family favorite recipe for so many reasons! Whether you fill these baked chimichangas with your taco leftovers or the below recipes, these crunchy burritos will be a big hit!
If you try this recipe, please come back to leave a comment and a rating!
Oven Baked Chimichangas
Ingredients
CHICKEN FILLING:
- 2 cups chicken thighs cooked, shredded or chopped
- 2/3 cup salsa I use Trader Joe's red or green salsas
- 1 teaspoon ground cumin
- 1/2 teaspoon oregano
- 1/2 cup Daiya cheese or favorite shredded cheese
- 2 green onions chopped
BEANS:
- 14 OZ can pinto beans w/ soaking liquid
- 1 slice bacon finely chopped
- 1 teaspoon cumin
- 2 teaspoons Fiesta chili powder
RICE:
- 1 1/2 cup California basmati rice or long grain
- 2 tablespoons avocado oil
- 1 teaspoon sea salt or more to taste
- 3 cloves garlic smashed
- 2 oz tomato paste which is 1/2 a small can. See tip above for storing extra or use tomato sauce if it is what you have
- 2 teaspoons cumin
- 2 1/2 cups chicken broth
For Assembly:
- 6 brown rice tortillas
- 1 cup shredded cheese Daiya, or any allowed cheddar
Instructions
- Preheat oven to 400 degrees.
- Start your rice. Heat oil over medium high heat in a pot with a tight fitting lid. Add in the rice and stir to coat with the oil. Continue to cook and stir every minute or two to toast the rice (see picture above). When it looks like mine, you're ready to move on. This normally takes about 5 minutes or so. Add in the salt, garlic, paste and cumin, stirring to blend. Add in the chicken broth, stirring to blend again. Bring to a boil, cover, reduce heat and simmer for 15-20 minutes until rice is tender.
- Meanwhile, cook your beans! Saute the bacon in a small pot until crisp and browned. Pour in the whole can of beans with their liquid, and add the spices. Partially mash the beans with a potato masher or fork. Simmer while you prep the remaining items.
- Stir together all your chicken filling ingredients.
Assembly
- Heat a teaspoon or two of oil/fat in a pan large enough to accommodate the brown rice tortilla. (As a side note, anyone who had used these knows, if you try to roll them up cold, they will break. I have also had NO luck using the microwave to heat them for rolling. By heating the tortilla in fat, you are adding the oil to make the tortillas super crunchy in the oven too) Heat the tortilla until soft and pliable, about a minute, remove.
- First spread some beans, then the chicken. There is no science to how much of each, you just want to make sure you can roll it up! Top with some cheese.
- Once filled, roll the tortilla tightly up. I like to start a tight roll, after one turn, I then fold the outside edges in and THEN finish rolling the rest of the way. Placing seam side down on a cookie sheet. Make the remaining chimichangas. If you used no oil or flour tortillas, brush the chimichangas with oil before baking them.
- Bake for about 25 minutes until crisp and golden. Garnish with any extra cheese, salsa, avocado, chopped lettuce, or hot sauce. Serve on a bed of Spanish rice.
Nutrition

Any of the links in my posts may be affiliate links. If you click on them and make a purchase, I might make a commission. Your support is much appreciated and pays for the cost of running this free resource!
I’ve actually never had a chimichanga, but my hubby grew up on the freezer ones, so I’m sure this would be a huge hit with him. 🙂 Pinning for later! 🙂
Beautiful! I can’t wait to try these this weekend. Any thoughts on freezing these babies? I’m cooking for one :S Would it be better if I bake them then freeze or freeze, defrost then bake?
Love the tip about reheating the tortillas! I haven’t had any luck on my own so I’ll give this a go! Thank you very much.
Hi Karen!! Freezing *should* work well! I would freeze it BEFORE baking it, then just thaw and bake as normal! Yes, try the reheating with the oil in a pan..it works wonders with these babies!
I will be making these for my granddaughters, they look delicious. Thank you so much for sharing with Full Plate Thursday today, it is great to have you at the party. Hope you have a very special week and come back soon!
Miz Helen
Hey girl…I still, still, STILL make this recipe. It’s one of our favorites.
AND my family STILL sings the song (from the first time I made them over 2 years ago): “Chimichanga, chimi-chimi-changa.” I kid you not. Ha ha.
xoxo,
–Am
Your Chimichangas look fantastic! I love that they are baked, instead of fried. I have never made chimichangas before, but I am definitely adding it to my list of recipes to try.
Your Chimichangas look so delicious! There are so many lovely healthy ingredients in them too. Thank you for sharing them.
These look great! I am going to try to make them vegan for us. Thanks for all your awesome recipes and pictures. I admire you.
Thank you allison, what a thoughtful comment! I bet a a black bean/sweet potato mixture would be good, one of my fav combos! But really, this is a technique thing,there are endless options for fillings! And you are certainly welcome for the recipes, you have amazing ones yourself! If you want any photo tips, let me know…i am still learning (I’m still a rookie!) but have learned a few things that have really helped!
Thanks for dinner tonight :). I happened to have things and now it’s assembled in the fridge for this evening. I never would have thought of chimichangas.
Yes Beth, I love having dinner all nicely prepped and ready to go before that infamous sour hour! If only I managed it every day…I guess most days is pretty darn good…enjoy, we love them!!
Mmmm…can’t wait to try this! Sounds delicious! 🙂
let me know how they turn out for you!
I love the tip on the tomato paste! I have been avoiding recipes with a little tomato paste because of the waste. Thanks for the technique on baking chimis too!
i am so glad it will be helpful to you! Necessity is the mother of invention….welcome rachel!
Delicious!